
After refurbishing the stair risers I realised how “tired” the balustrade looked so I decided this would be my next project.
One of our friends – Brian, who also has an Ocean Alexander – asked me to post if I found an easy way to sand the balusters. So this is my new post to address his comment, and as you can guess by the title, there’s no easy way to do this. But I thought I’d write about the process I followed and share some tips for doing the job.
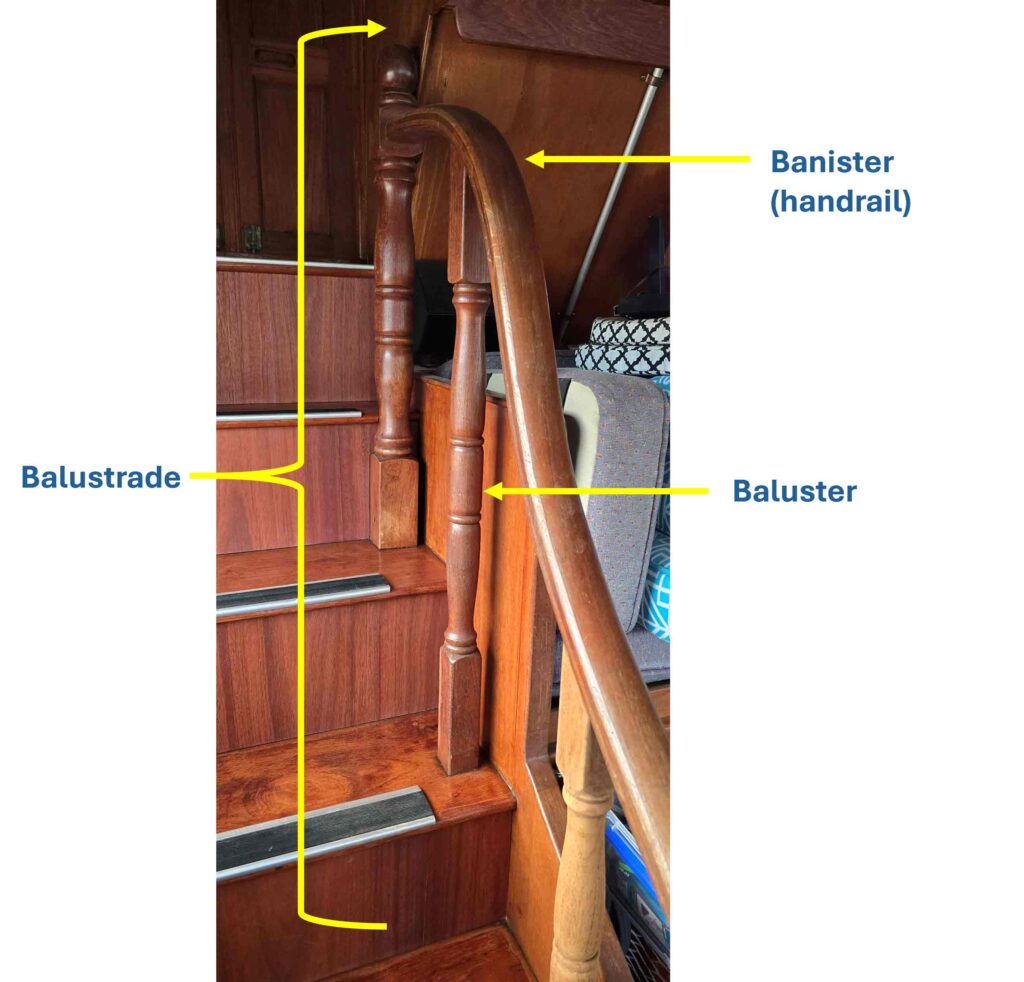
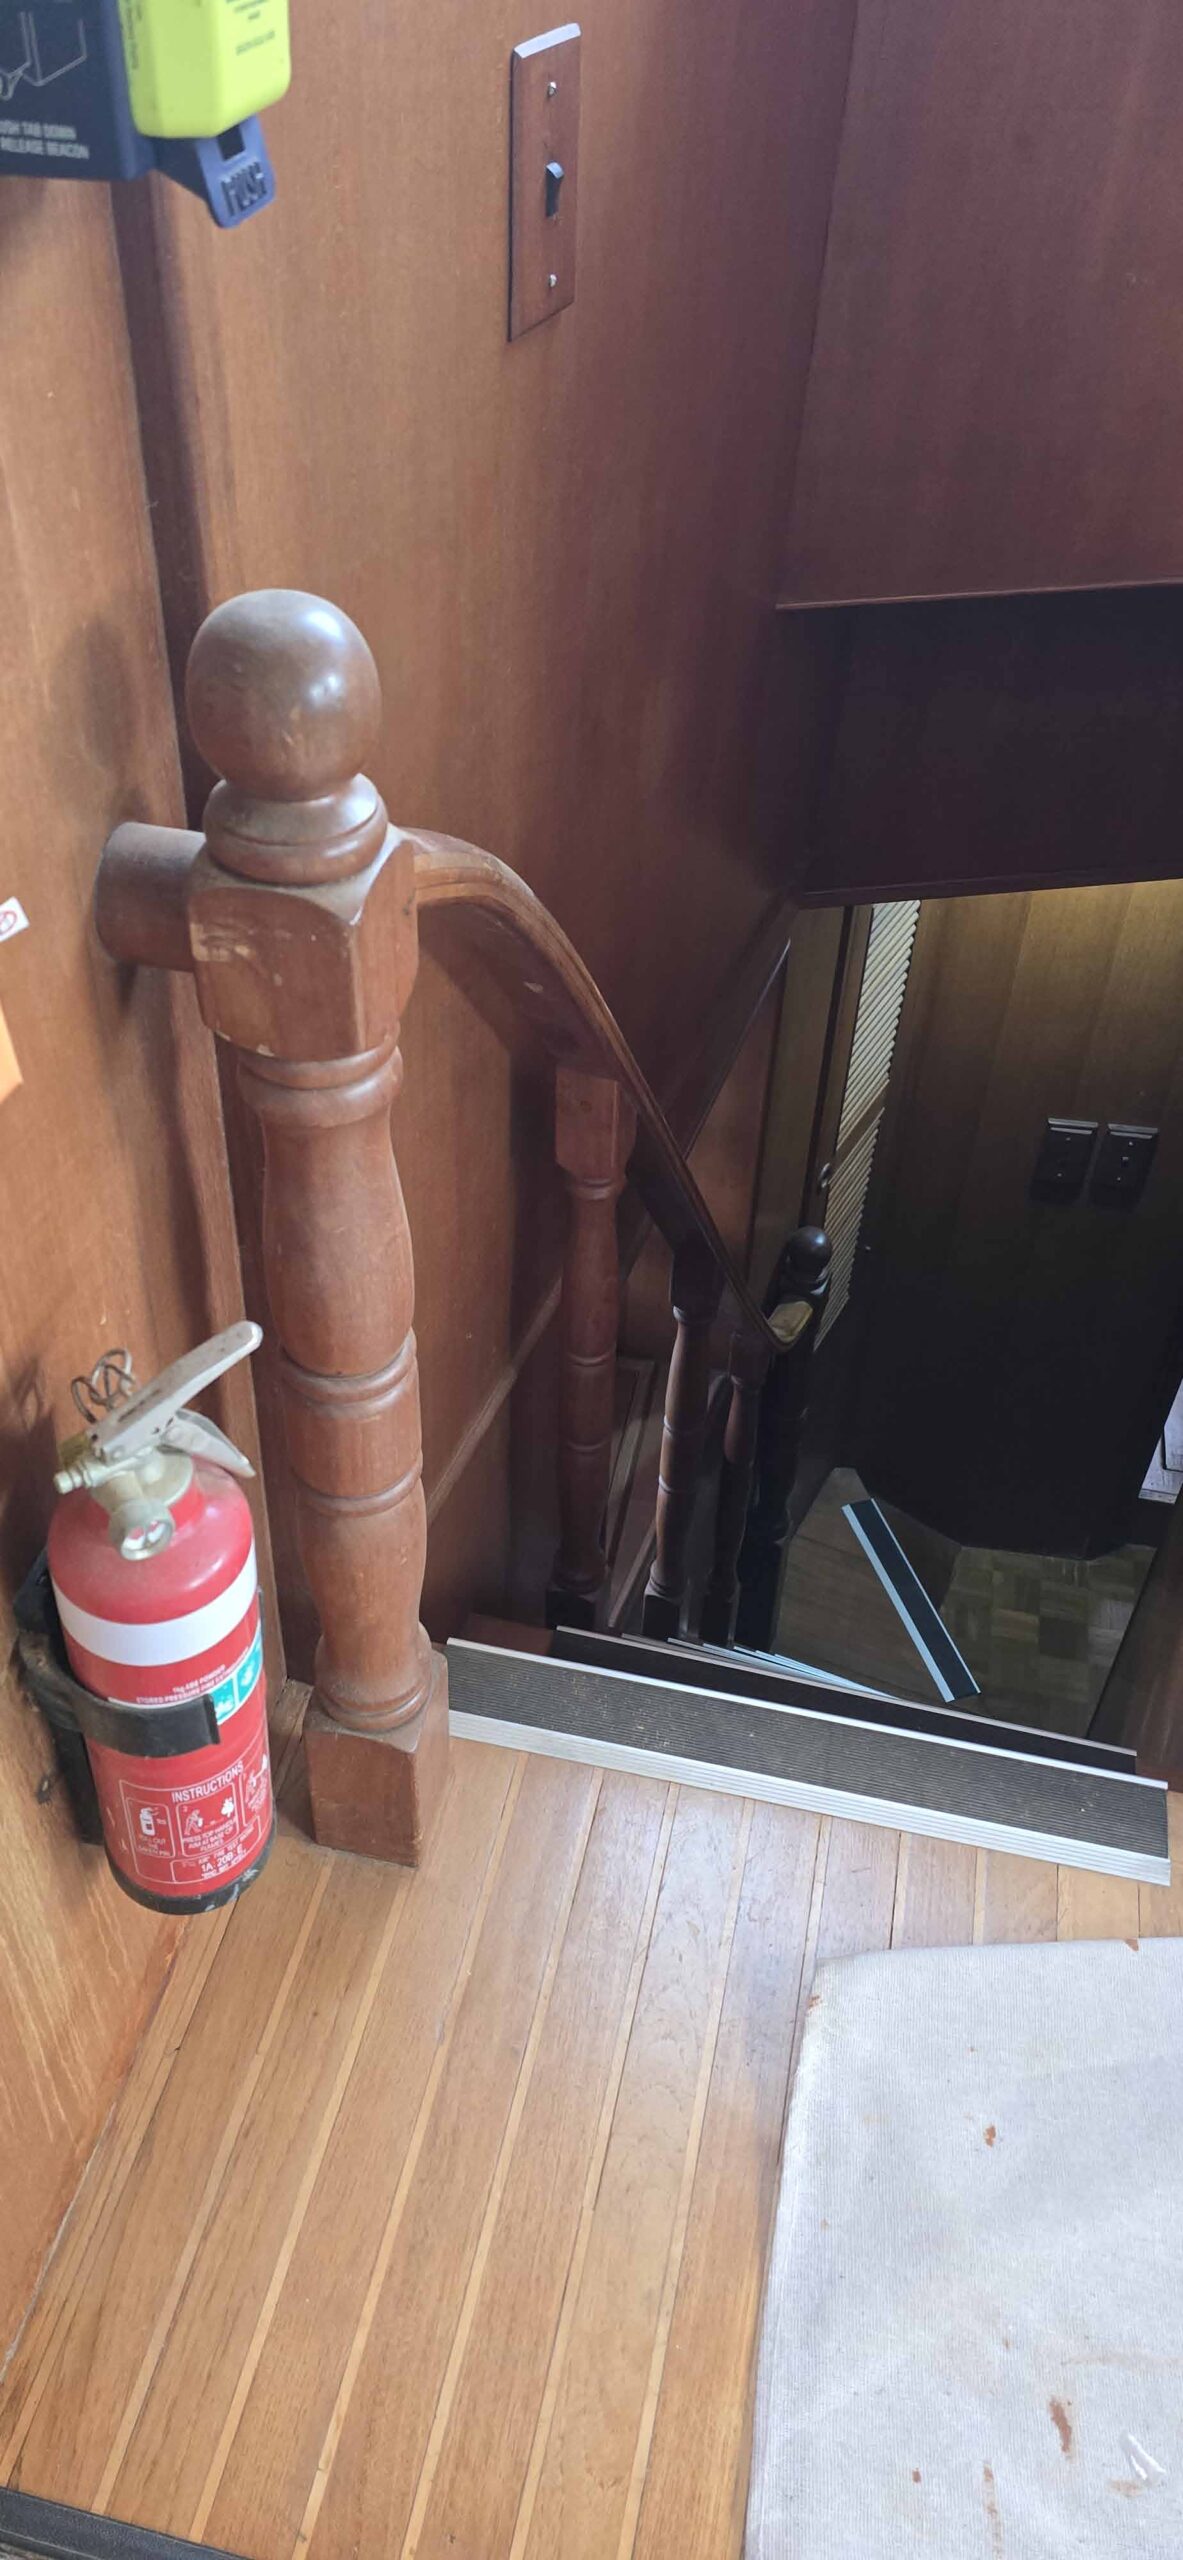
Some terminology
Balustrade, baluster, banister, what do they mean?
- A banister is the handrail, the latter which is more commonly used. In this post, I’ll just refer to the handrail.
- A baluster is the vertical post that rests on a stair and supports the handrail.
- A balustrade on stairs is a safety barrier that comprises a series of balusters topped by a handrail.
Here’s an images showing these three components and if you look carefully, you’ll see it looks a quite faded.
Sanding the balustrade
Think of the money you’re saving, and job satisfaction you have, by sanding it yourself! It’s not a hard job, but rather laborious. However, since I’m retired from paid employment, time is something I have, and I knew that I could improve how it looked.
These are my tips for sanding the balustrade for varnishing:
- Have a dustpan and brush or vacuum nearby and clean up the mess regularly.
- Wear your protective equipment, mask, eye protection, and so on.
- Get a good audio book and listen to it as you sand. I’ve just finished The Frozen River by Ariel Lawhon and it was excellent!
- Start with an 80 grit sandpaper and hold the paper so you can sand in long strokes up and down the plainer bits of the balusters and along the handrail.
- I like to cut off the paper and fold it into thirds, so it’s a bit thicker (more sturdy) in my hand, and quick to get a fresh piece – yes, I used a lot of sandpaper!
- Cut up smaller pieces of sandpaper, fold it in half, and use these pieces to get into the crevices around the decorative areas.
- Move to a 120 grit sandpaper and repeat as above.
- Wipe the entire area down with a damp cloth (not too dry) as this will help raise the grain and you can then proceed to a 240 grit sandpaper and sand as before to ensure the wood becomes very smooth.
- While you don’t want to be a perfectionist, because perfection is the enemy of progress, good preparation is everything.
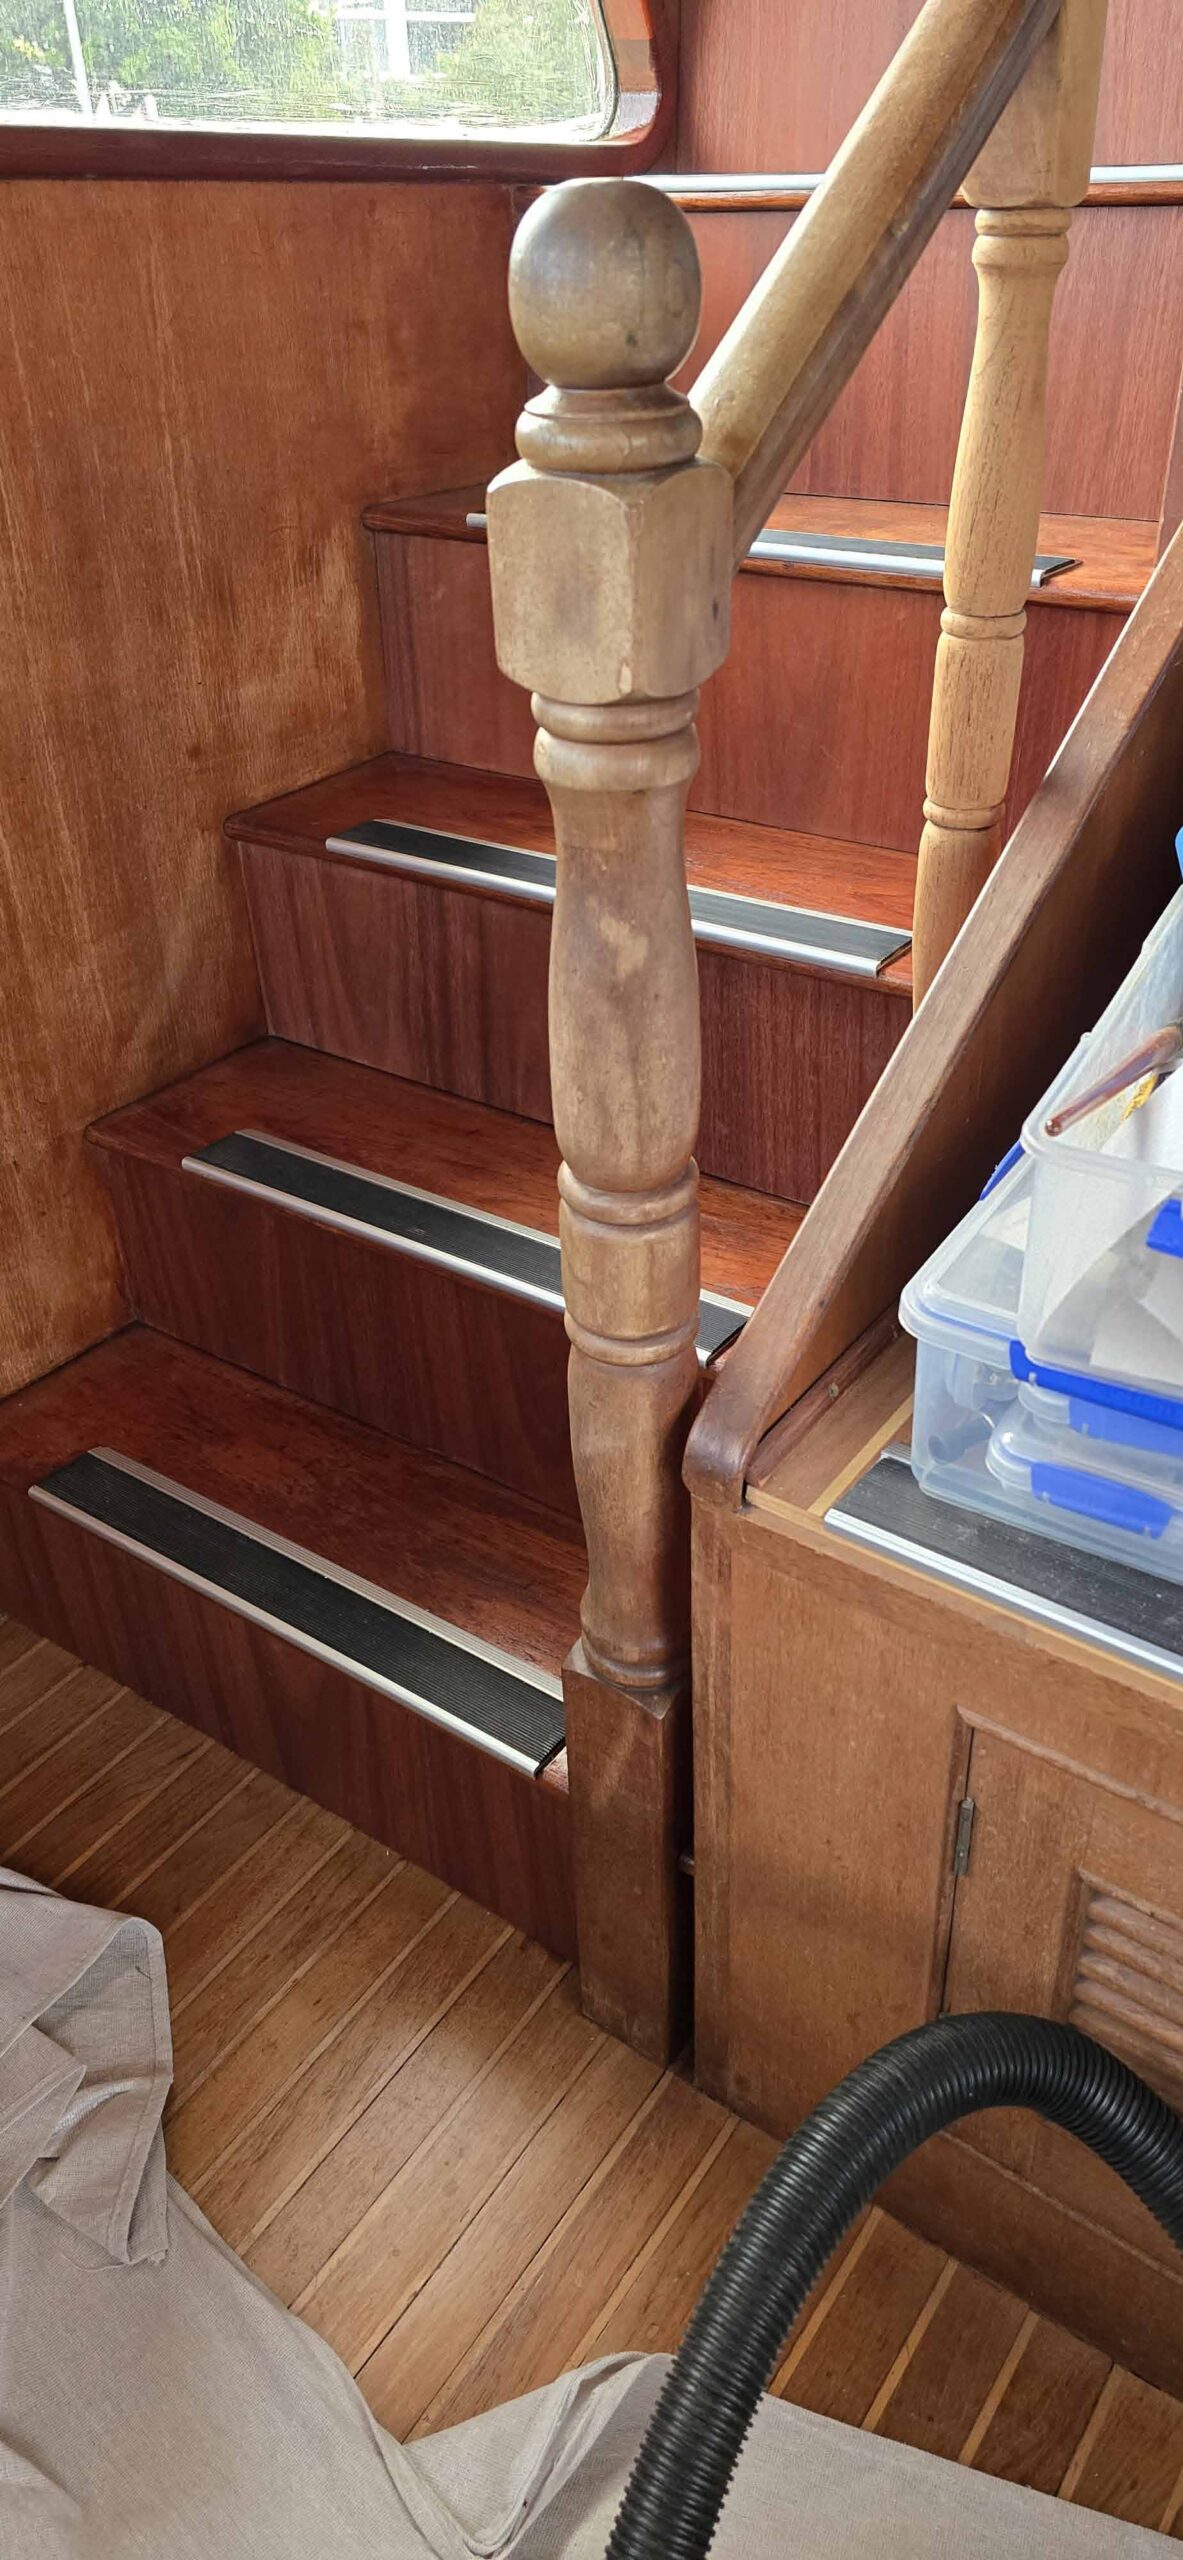
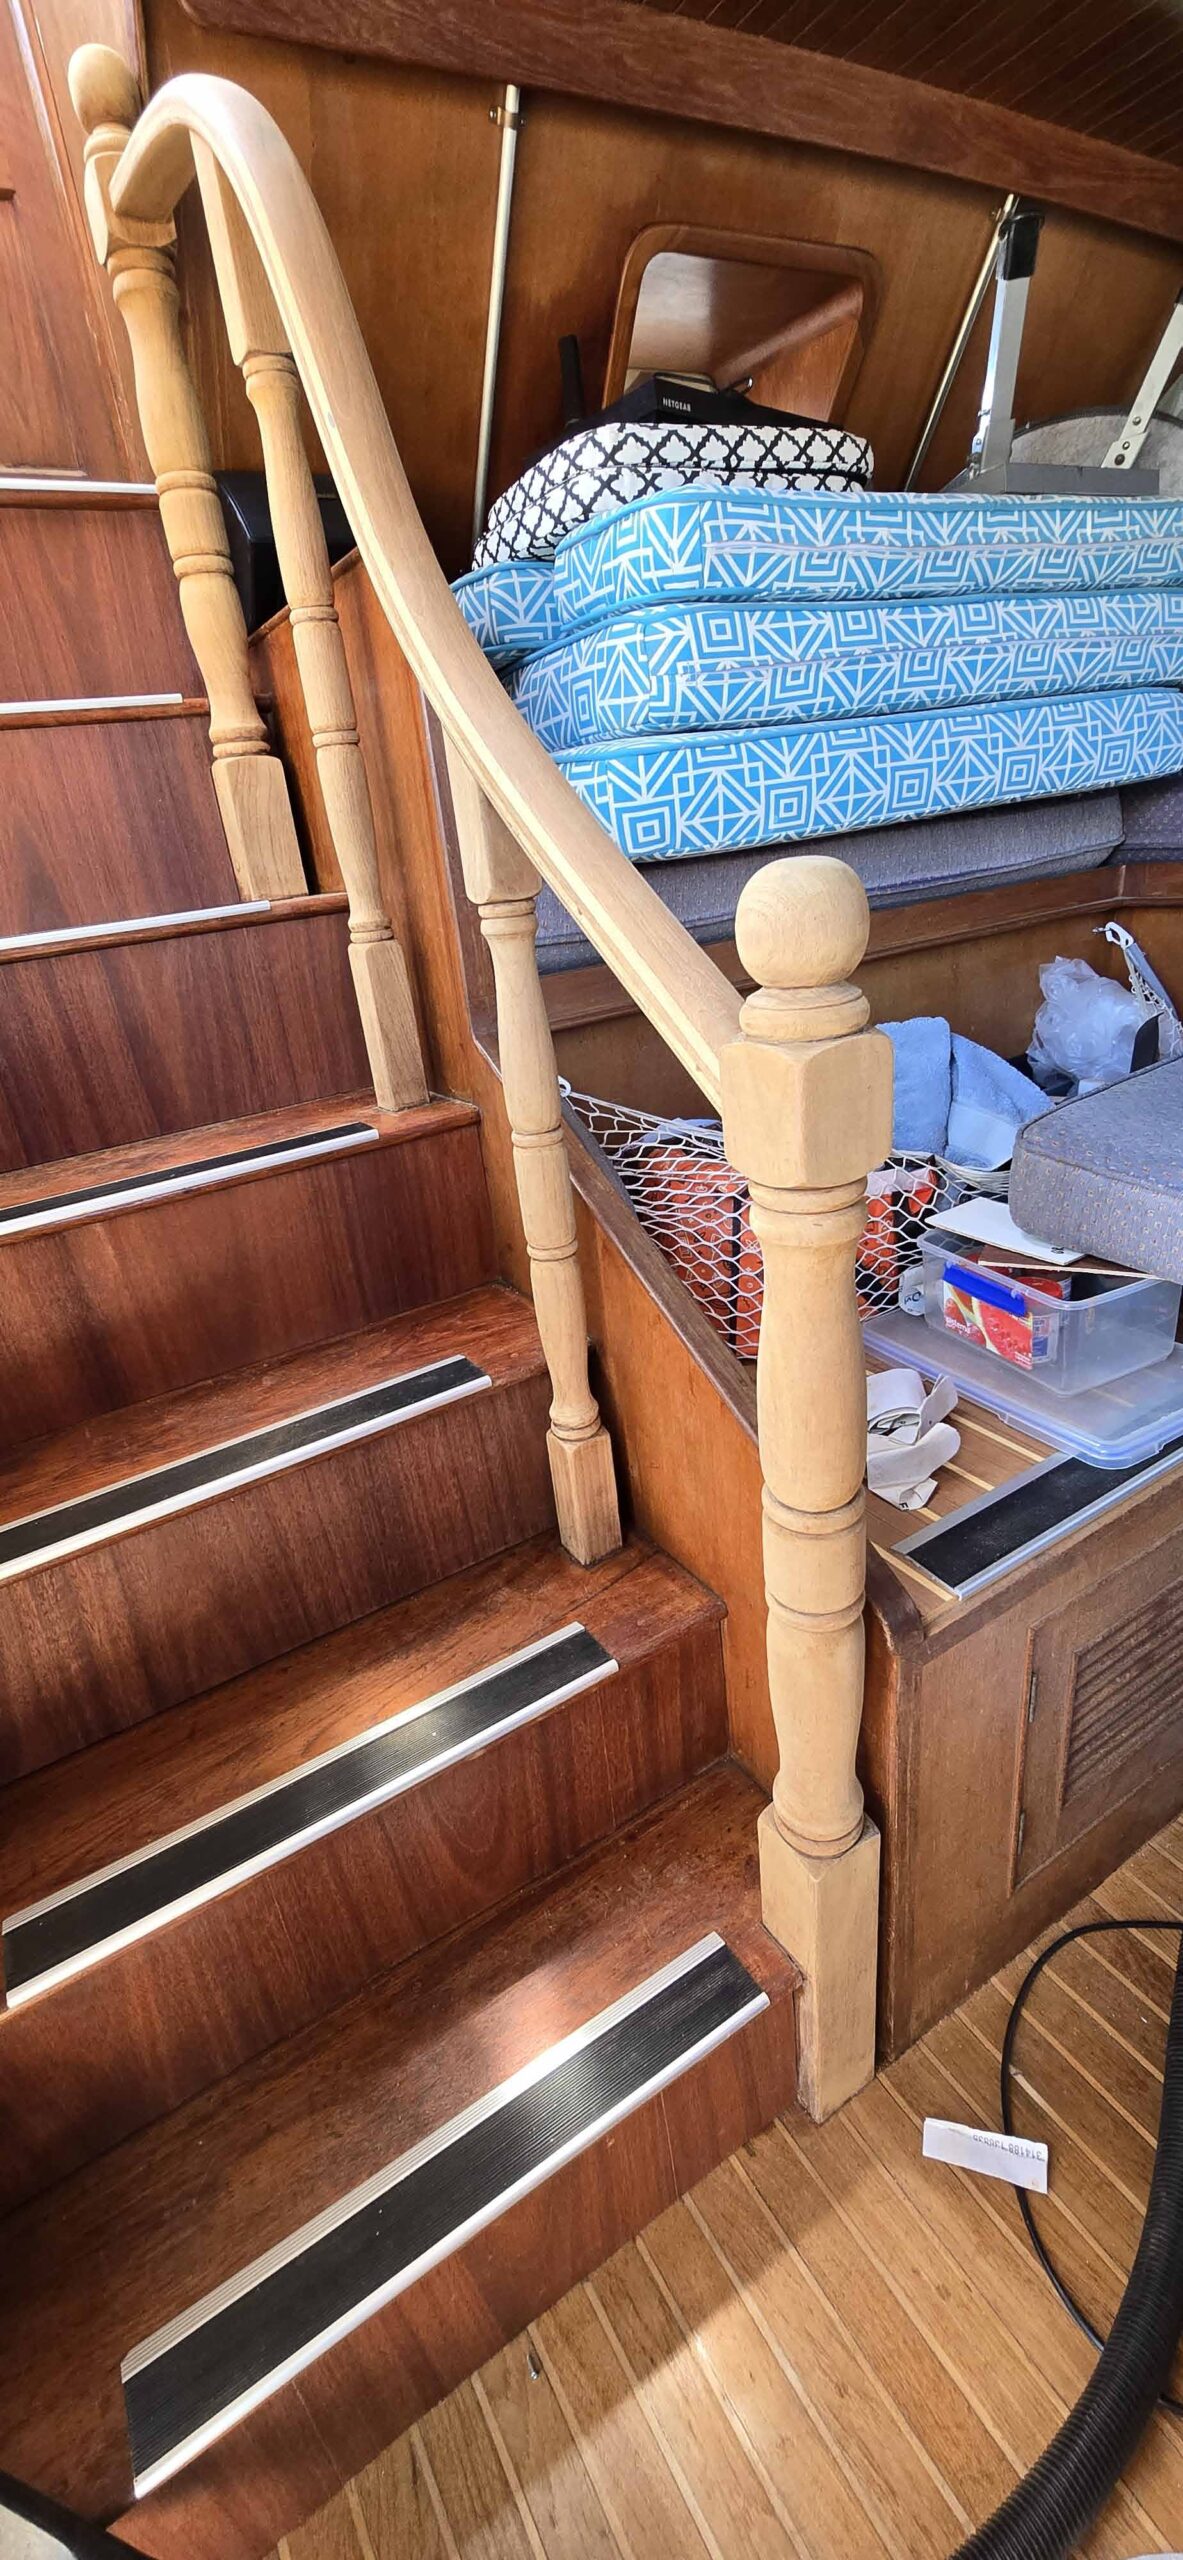
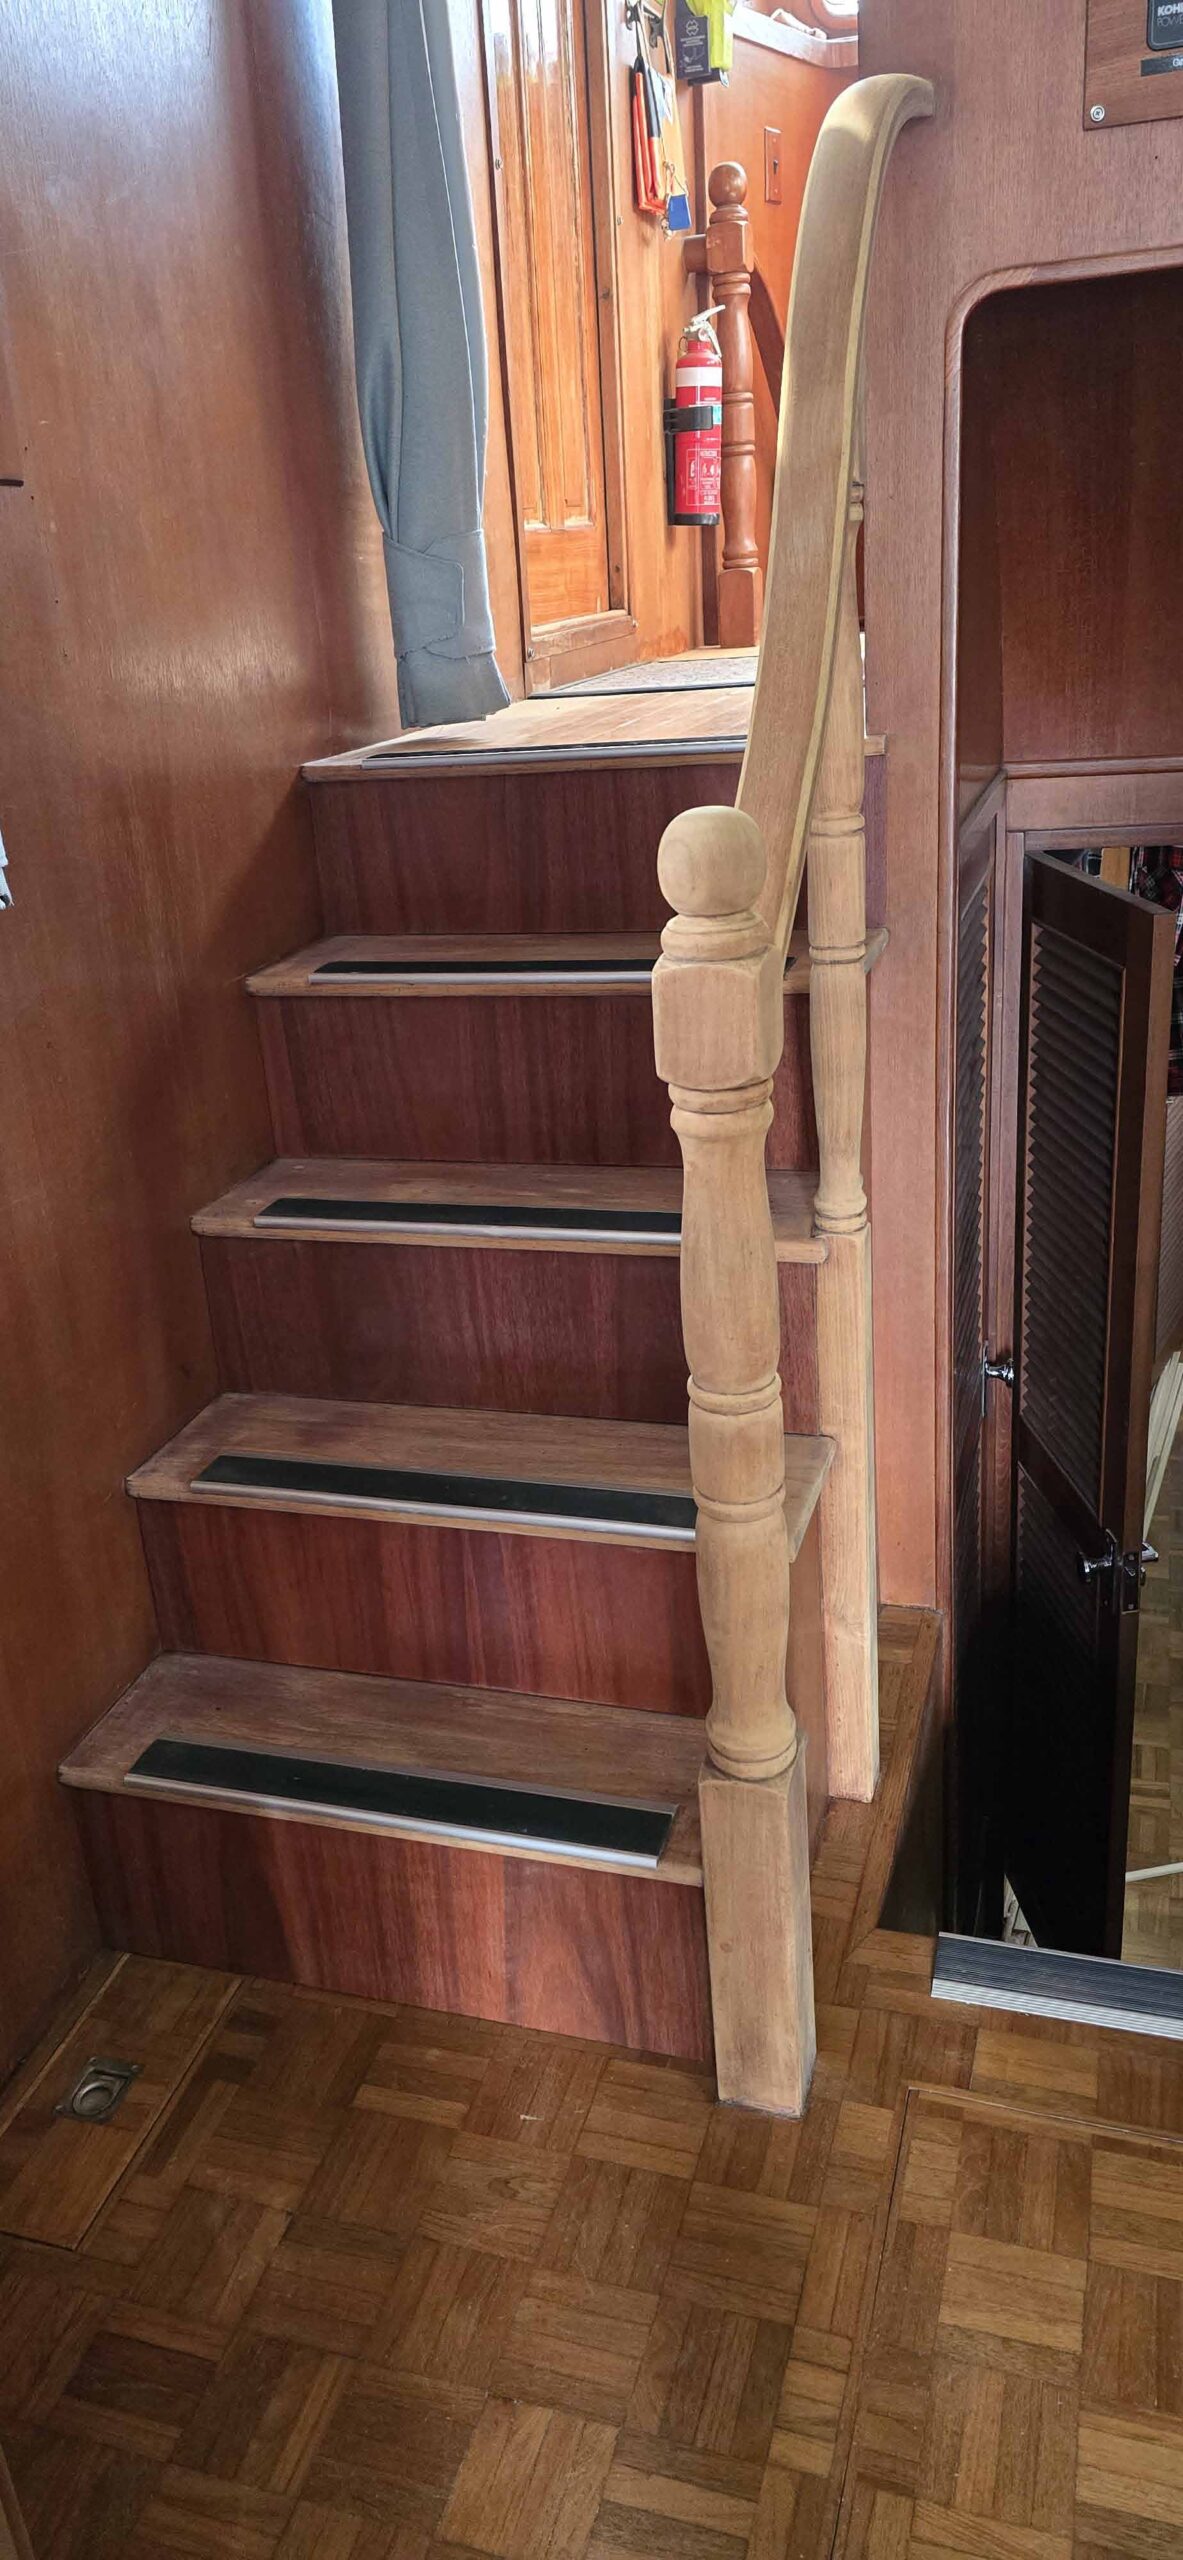
I started by completing the balustrade from the pilot house to the flybridge. When I realised how good it looked, I decided to tackle the one from the saloon to the pilot house. Here are photos taken during the sanding phase of both balustrades.
Varnish the sanded balustrade
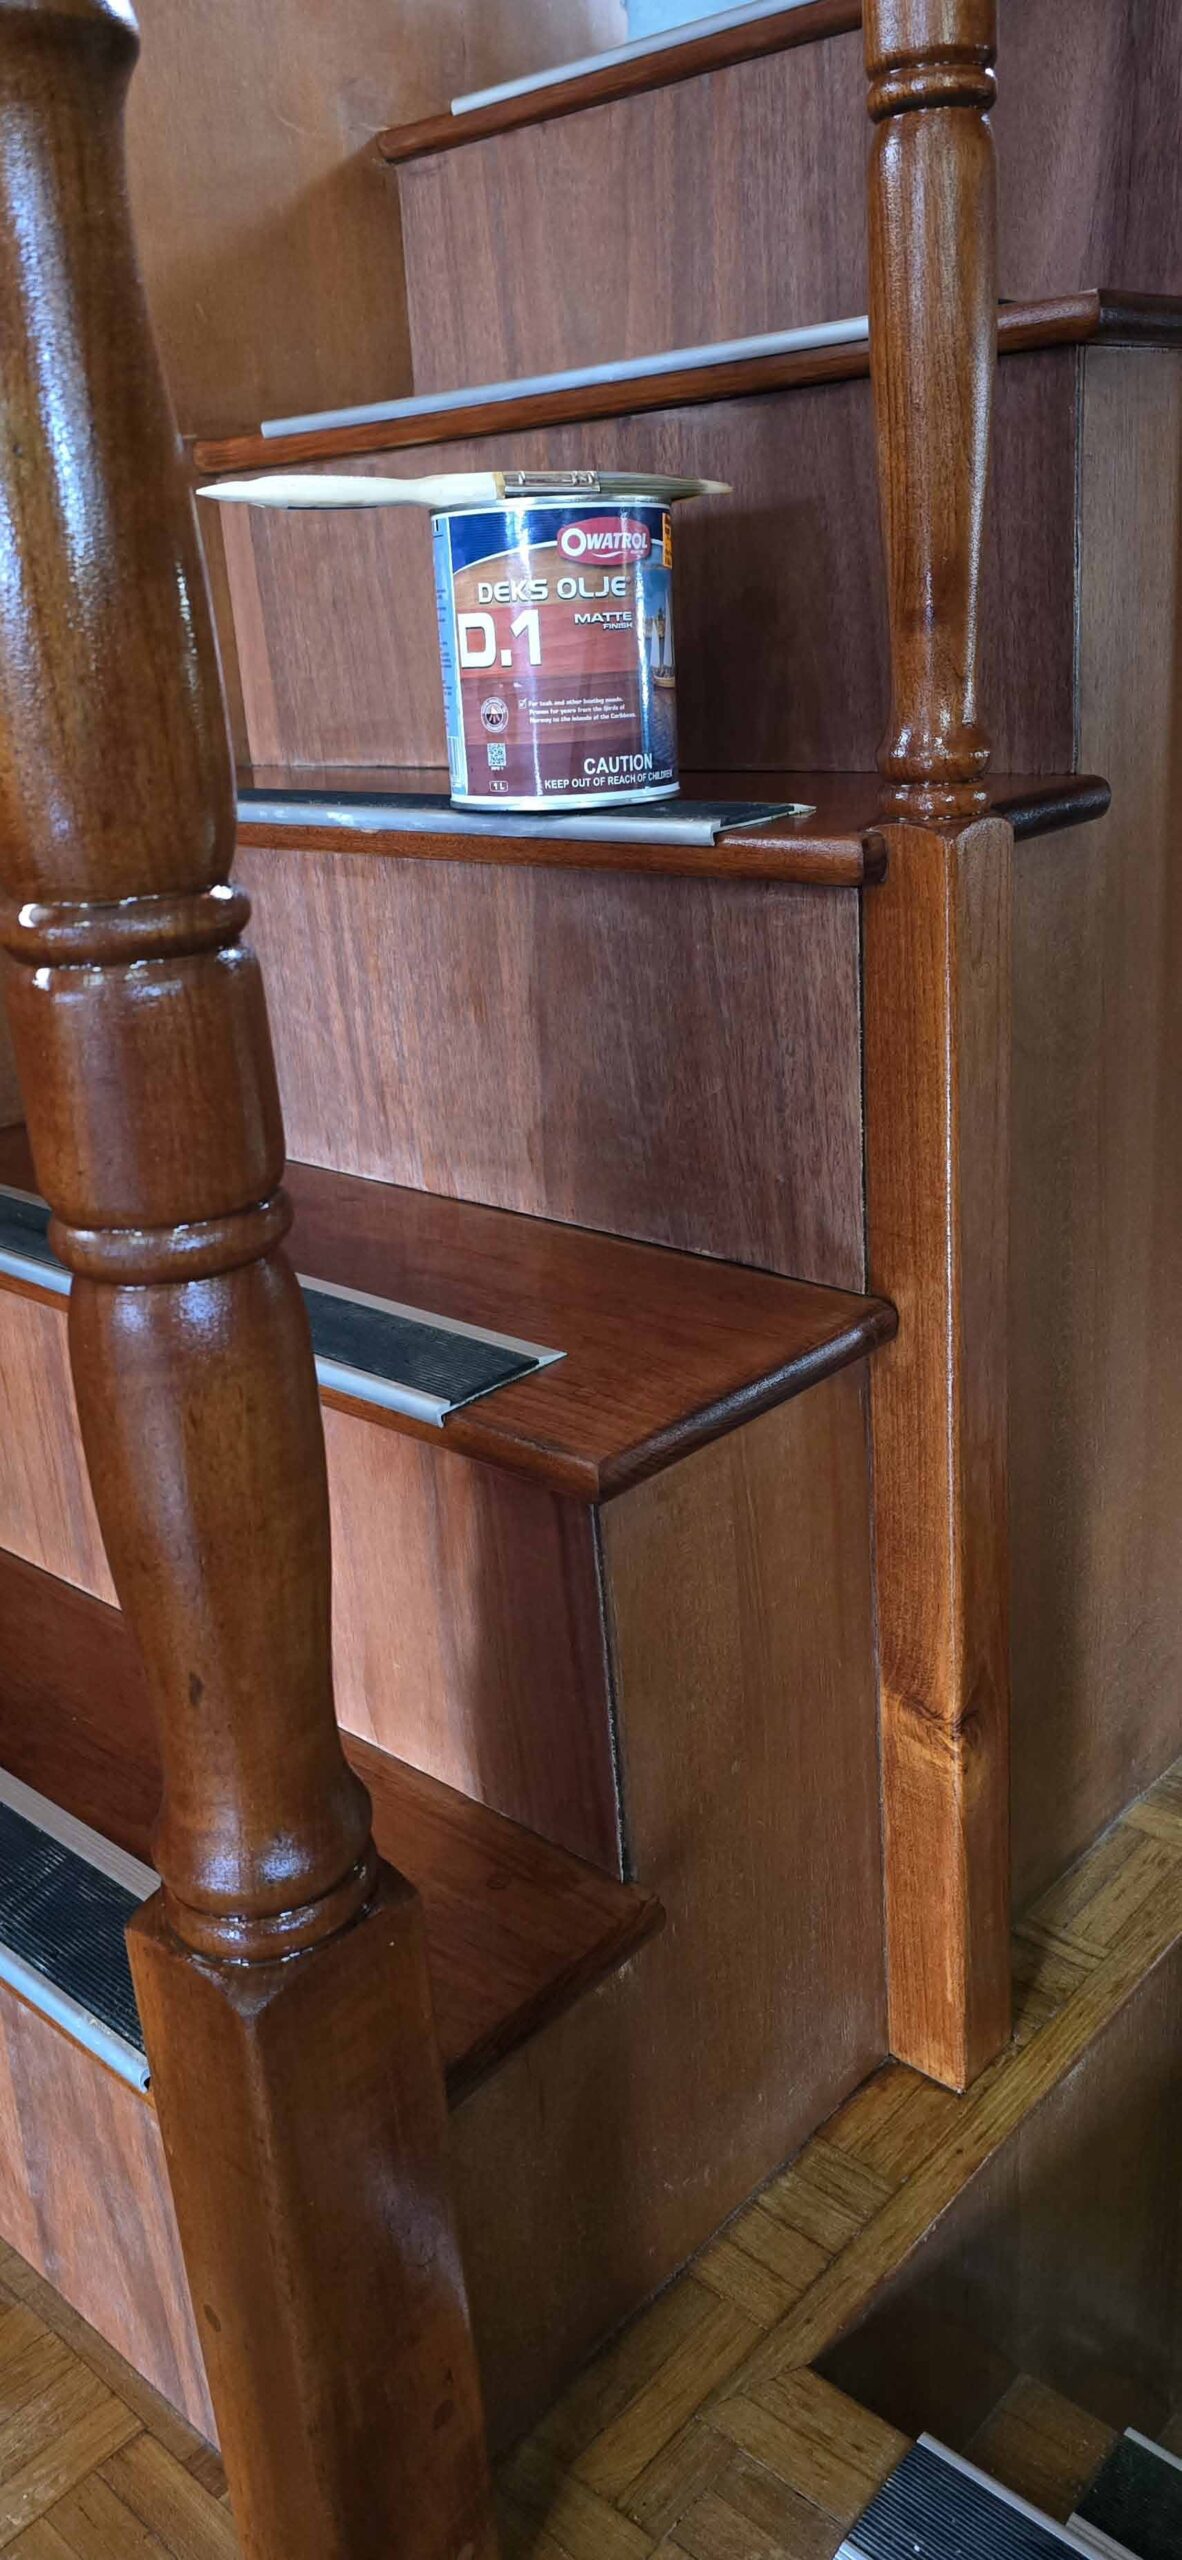
I should point out here that I didn’t use a “traditional” varnish on the balustrades. I decided to use a product called Deks Olje, which I’ve used in the past. In my opinion, it’s easier to apply.
Since this step comprised two products, Deks Olje #1, which soaks into the timber and gives a rich, transparent finish and Deks Olje #2, which provides that lovely gloss finish, I’ll write about these separately.
Apply Deks Olje #1
Start with Deks Olje #1, and keep brushing it on until the timber is saturated. I left it overnight, then repeated again the next day, as I didn’t thing the timber seemed evenly saturated. A second application brought it to a level that I liked.
Then you have to wait a minimum of 3 days before moving on to the next product. This allows the oil cure and dry within the pores of the wood. Here are some photos.
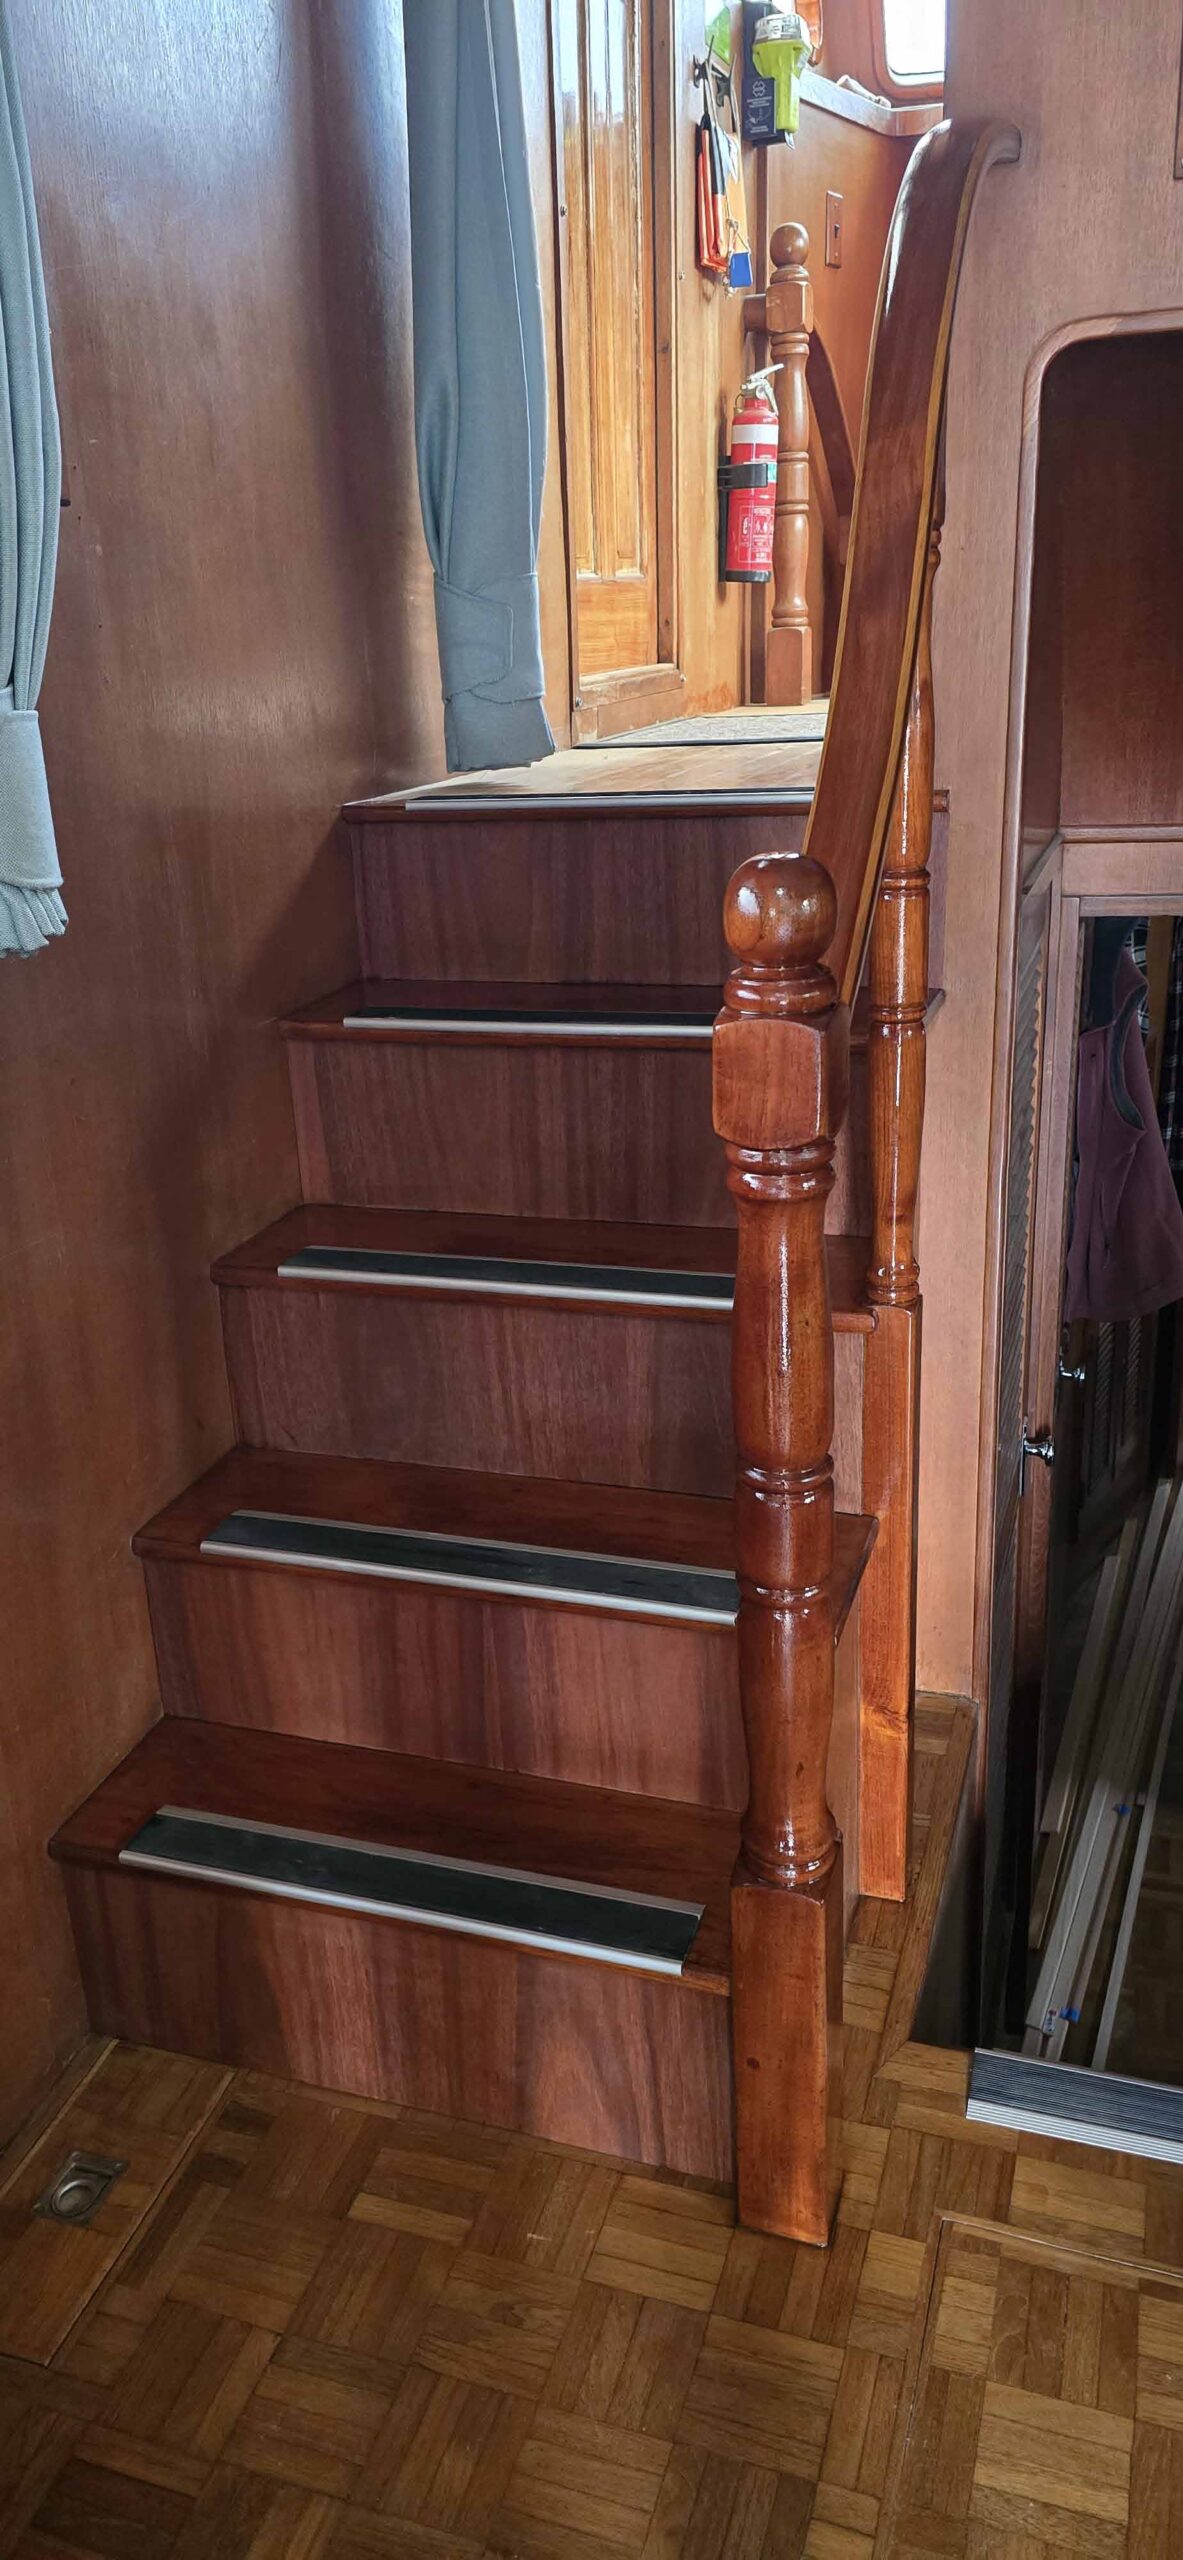
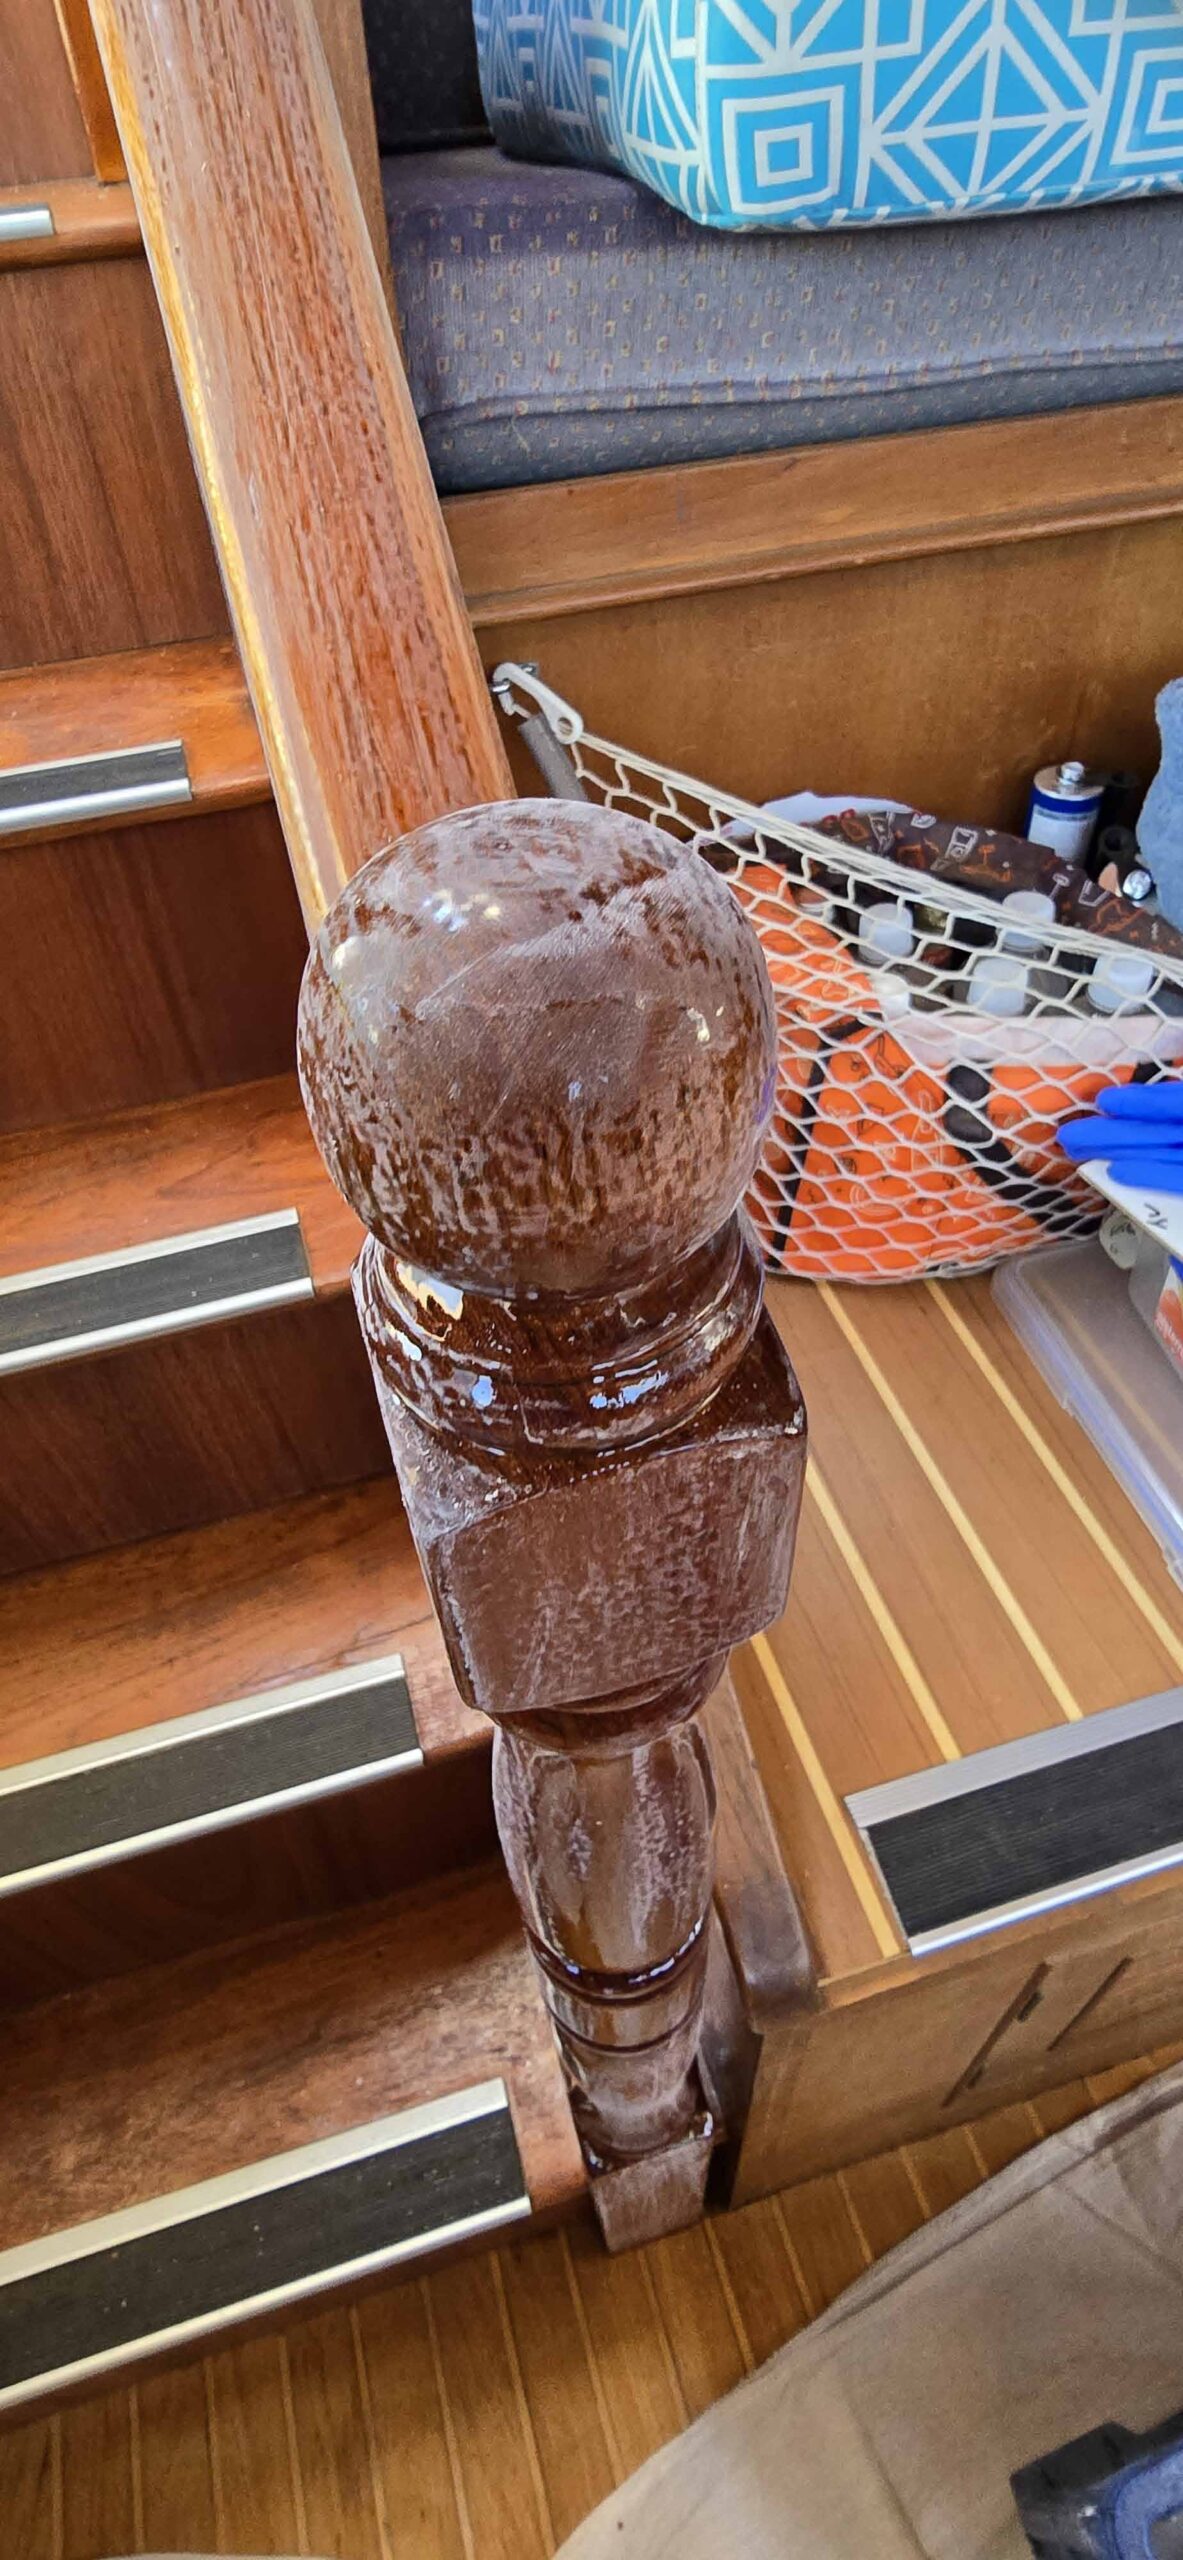
Apply Deks Olje #2
When you apply Deks Olje #2, you should apply one coat per day. I actually ended up allowing 2 days between some coats when it still felt a bit tacky. If you don’t do this, the product will not cure properly and will lead to a sticky surface that can catch dust (and cat hairs).
I used a good quality paint brush and wrapped it in foil between coats. If the brush seemed gluggy when I unwrapped it, I used a new one. A good brush helps to ensure you have a good finish. Usually you can reuse the same brush for 3 consecutive days.
Between coats, I did a light sand using a 400 grit sandpaper and focused on the “rough spots”. After the fifth coat, I did a more thorough sand with 400 grit sandpaper and also wiped the balustrade over with methylated spirits. This removes the dust and evaporates (flashes off) quickly. Then complete the sixth (last) coat.
Here are some photos.
What's next?
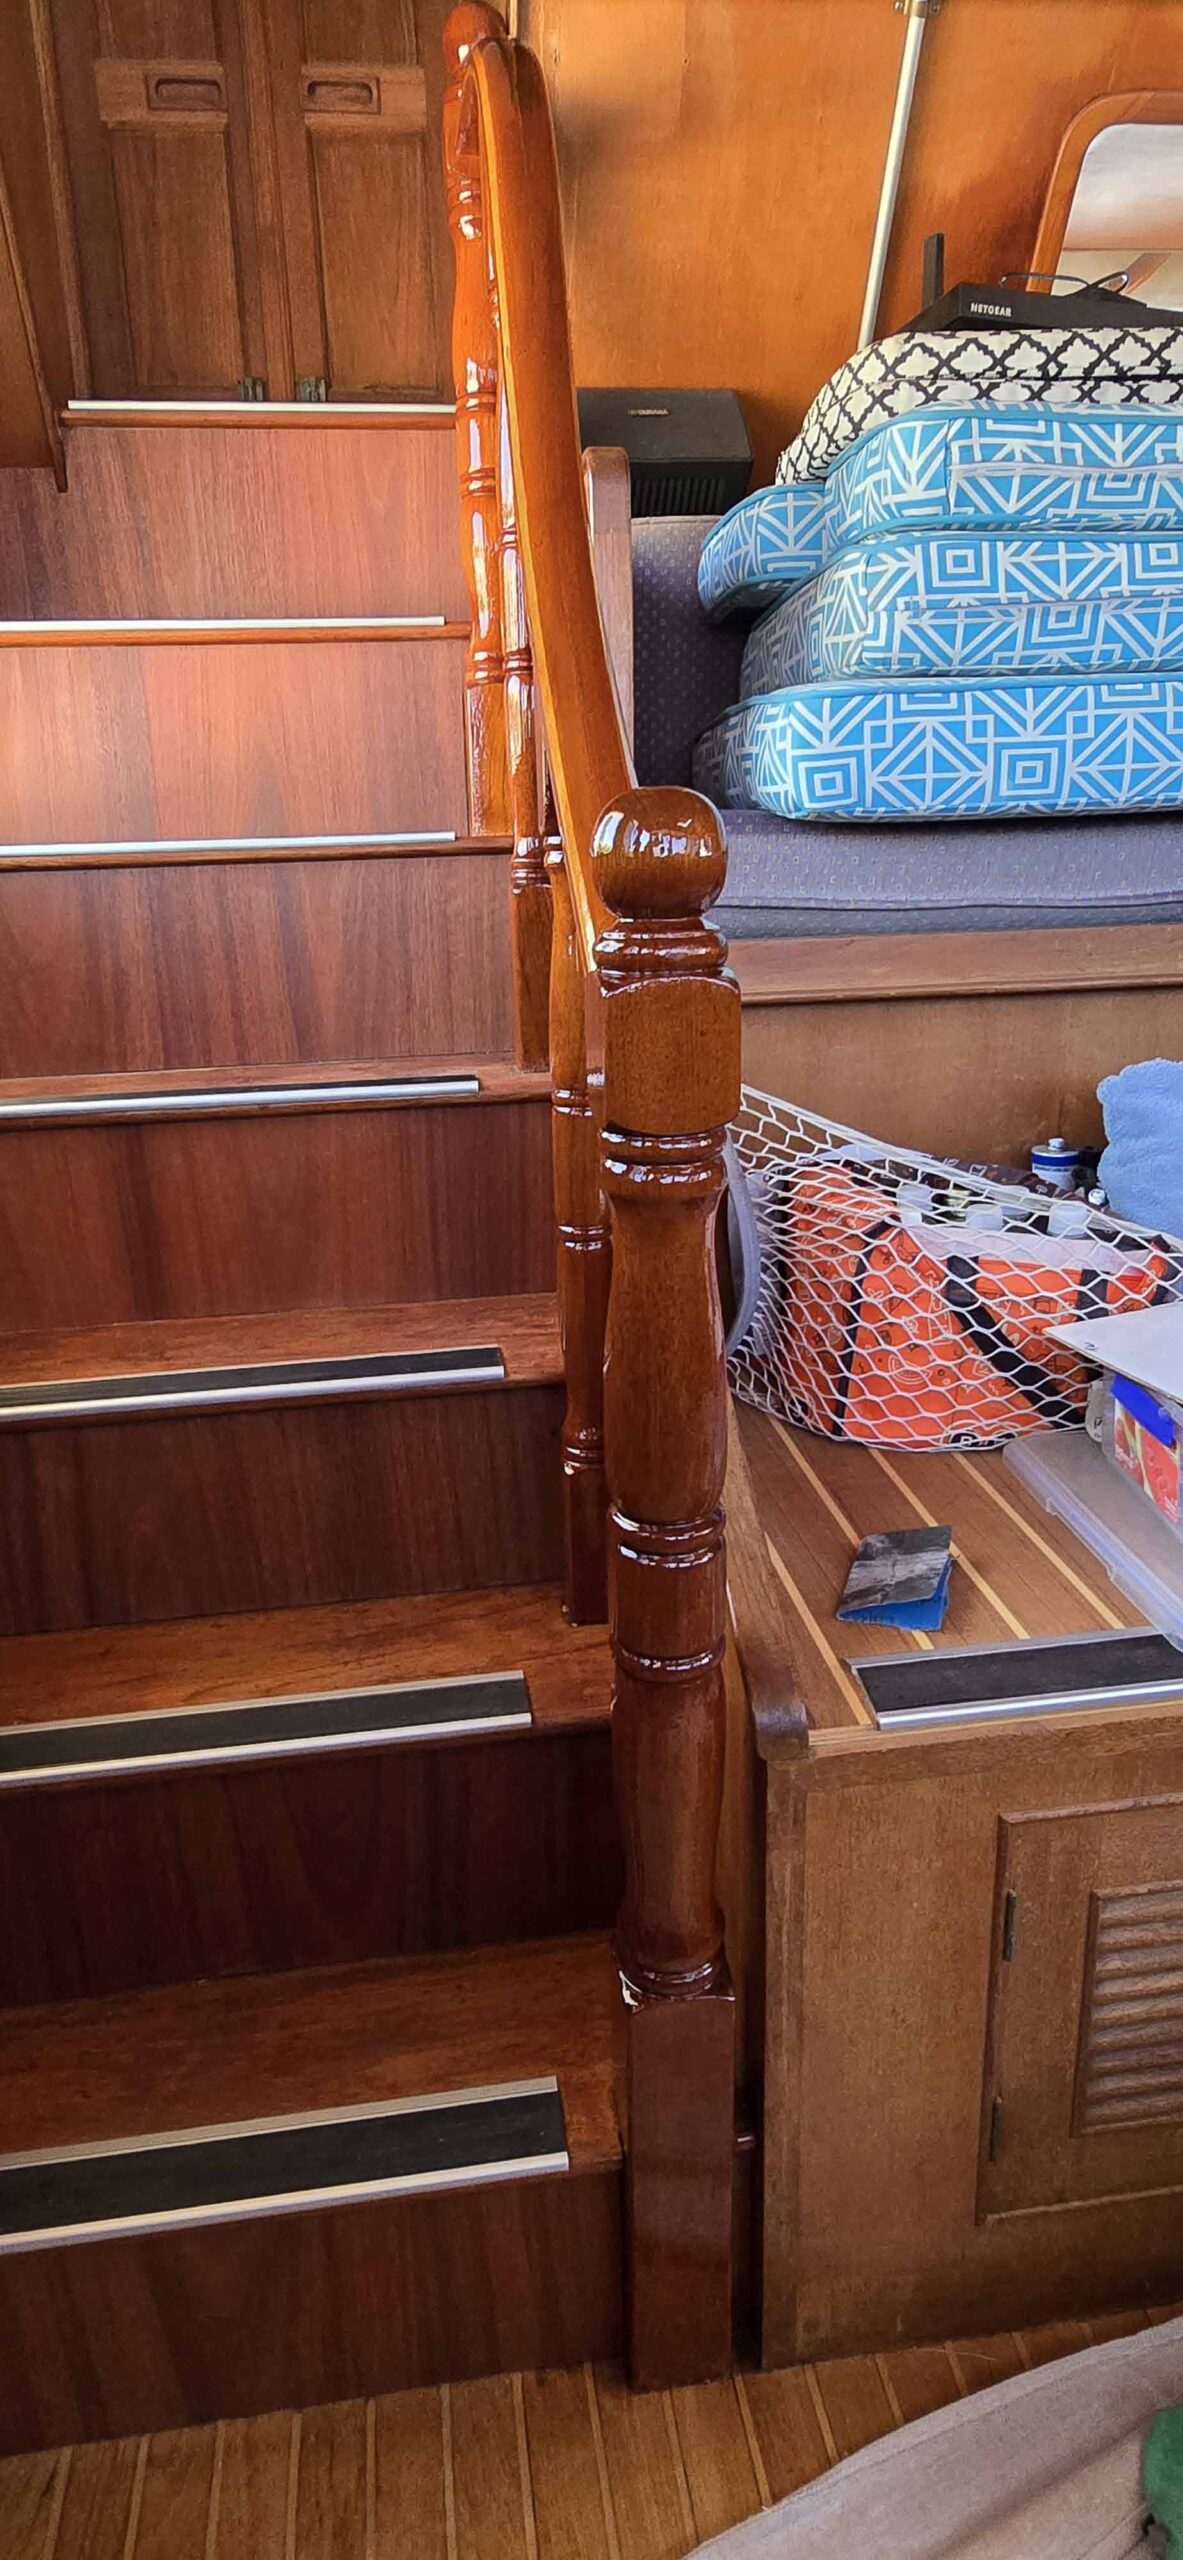
I’m very happy with the results of this project. The balustrades, while not perfect, look much better than before. And, if I need to refresh them, it’s just a light wet sand with #1 and a couple of coats of #2, so much easier than starting from scratch.
But there’s another, longer balustrade from the pilot house down to the two forward cabins and shown in the photo below. It has 5 balusters and a longer handrail. I don’t feel like doing this one at the moment, and besides, I thought I’d write about the project Robert is doing next.
9 Responses
It was well worth the effort required – the balustrades look beautiful xx
Well done Pam! A ton of work there!
Well done Pam! A ton of work there!
Looks fantastic Pam! Thanks for the tips, although ours have held up well they are still on the never ending list of boat jobs on Lady capri
Nice job Pam! No doubt very saitfying every time you use the stairs.
I think I did mine back in 2012 or 13. And yes they could do with a refresh now. But the sanding takes forever. A year or so ago I re-did the rails and topknob of the end bannisters with Awlwood. Thjey look great, but I’m not in a rush to do all of the bannisters!
I used to use Deks Olje on my exterior rails and although it was pretty good I now believe that Alwwood both looks better and last longer.
Deks Olle sounds like an excellent solution. I personally dislike polyurethane finishes because they never look better than the day they were applied and don’t achieve a patina. Impossible to repair and a horrible job to take back to bare wood.
Well done Pam! Looks like a great result!
Wow. I learnt so much reading your account. The end profuct does look great. Well done, Pam
Looks like a beautiful finish on the wood.
May
Fantastic job! There can’t be much more that you can do.
Love to both of you
Robyn & Chicka
P.S. give us a ring one day. 0418 297260