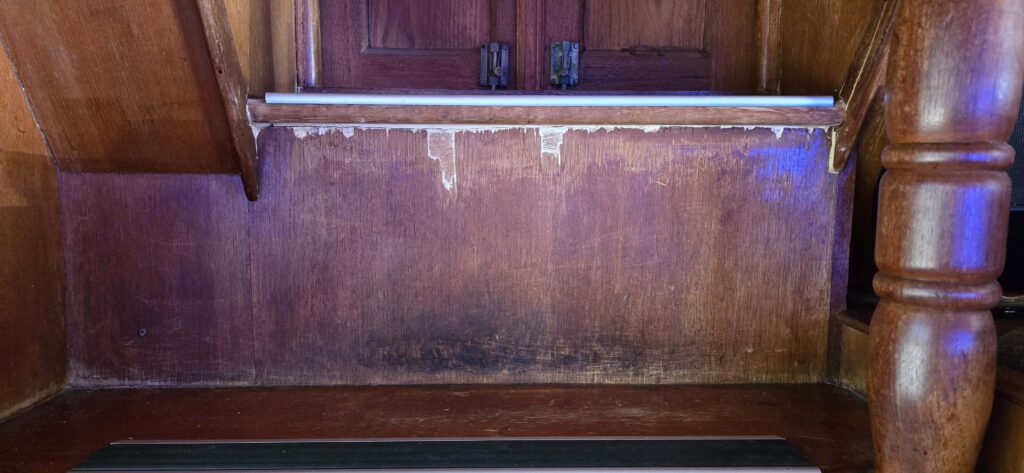
As you can see from the featured image above, this stair riser is in bad condition. It’s had water damage over the years and patches of veneer have come off. We couldn’t just refurbish this stair riser, because it would look out of place. So we decided to refurbish the seven risers that lead from the pilot house to the flybridge.
Initially I didn’t consider writing a blog but as I progressed I realised I’d learnt some good lessons that I wanted to share. So, many of the photos in this blog are from the second set of stair risers that I decided to refurbish. Read on for more details or scroll to the end for my best tip that saved this project.
Options for the refurb
We considered the options for this project. Because the risers are a veneer finish – not solid timber – we couldn’t sand, patch and varnish them. We also didn’t want to paint them. So we decided we’d cover the existing risers with timber veneer.
We did some research and found a distributor in Melbourne that supplied iron-on timber veneer in sheets measuring 2.44m long by 30.5cm wide by 0.6mm thick. After seeing the veneer we decided it was suitable and we’d purchase the ‘jarrah’ colour, which was the closest colour match to the existing teak veneer.
What's the plan?
Given the dimensions of the timber veneer (244 x 30.5cm) with the grain running with the length, we would need to cut 3 pieces of veneer and join them to cover each stair riser. Some of the stairs were more fiddly as well, and we realised that trying to iron the veneer directly onto the riser would be problematic, especially joining the pieces and getting into the tight corners.
So Robert came up with a great plan, outlined here:
- Make a pattern of the stair riser
- Cut a piece of plywood to the shape of the pattern
- Cut the timber veneer
- Iron the veneer onto the plywood
- Glue the veneer covered plywood to the riser
At the start of this project, Robert helped me but I quickly became confident to do work through this myself.
Making the pattern
Every stair riser is a different size and some have quite subtle angles especially along the side walls of the boat. We already had some 3mm corflute board handy from other projects, so I used this to make patterns – one for each step. It involved a lot of measuring and trimming and I found a stanley knife (box cutter) best for this.
When I made each pattern piece, I numbered/labelled it and identified the top left, bottom right etc.
It was important to test the pattern piece in situ to make sure it was a good fit. I quickly learnt that pushing the pattern piece against the riser resulted in it being quite difficult to pull out again – because I’d cut such a good pattern piece! So I figured I’d put a bit of blue tape behind that I could use to lever the pattern away, and this is shown at the bottom riser in the photo below. The other pattern pieces in this photo didn’t need tape because they could be slid out on the right hand side of these steps.

Note: Originally, I was only going to refurbish the stairs leading from the pilot house to the flybridge. But when I realised I needed to buy more veneer due to some initial problems (let’s say a learning curve) we decided to also do the stairs leading from the saloon to the pilot house. This is a great example of scope creep that has now extended to me refurbishing the stairs leading from the master cabin to the saloon! But now it’s an easy job due to my “lived experience”!
Cutting the plywood
Once I had made the pattern pieces and checked that they were a good fit, I could then cut the plywood to the right shape, again using a stanley knife. This was a little tricky as you had to make sure the pattern didn’t slip when cutting, and you needed to repeat a cut several times to ensure it went through the thickness of the plywood. I ended up using some tape and even lead weights to help keep the pieces in place.
Once again, it was important to name/number the plywood pieces and identify the correct way up. You don’t see this in the photo below because I wrote these details on the reverse side.
I also did another test fit of the plywood. Some sections seemed a little tight, but it was easy to sand the edges to get a good fit. Once again, I stuck a bit of blue tape behind the bottom pattern to help lever it out.

Cutting the timber veneer
This wasn’t easy and I had a few fails initially. The timber veneer is only 0.6mm thick – yes very thin – and it’s fragile. The problems I had resulted in me having to buy another sheet of timber veneer.
Here’s a few tips that I learnt the hard way!
- It’s important to have a new/sharp blade in your stanley knife – a blunt blade tears the veneer rather than cuts it cleanly.
- Instead of pressing hard and trying to cut the veneer in one pass – again risking tearing the veneer – you need to do lots of passes with the knife until the veneer is cut clean through. A lighter touch was better, even though sometimes I had to run the knife over 6 or more times, especially when cutting against the grain.
- It’s better to cut the veneer a little bigger than the plywood piece and once it’s ironed on, trim it to size. This is because veneer shrinks under heat and it’s very hard to get the exact size required.
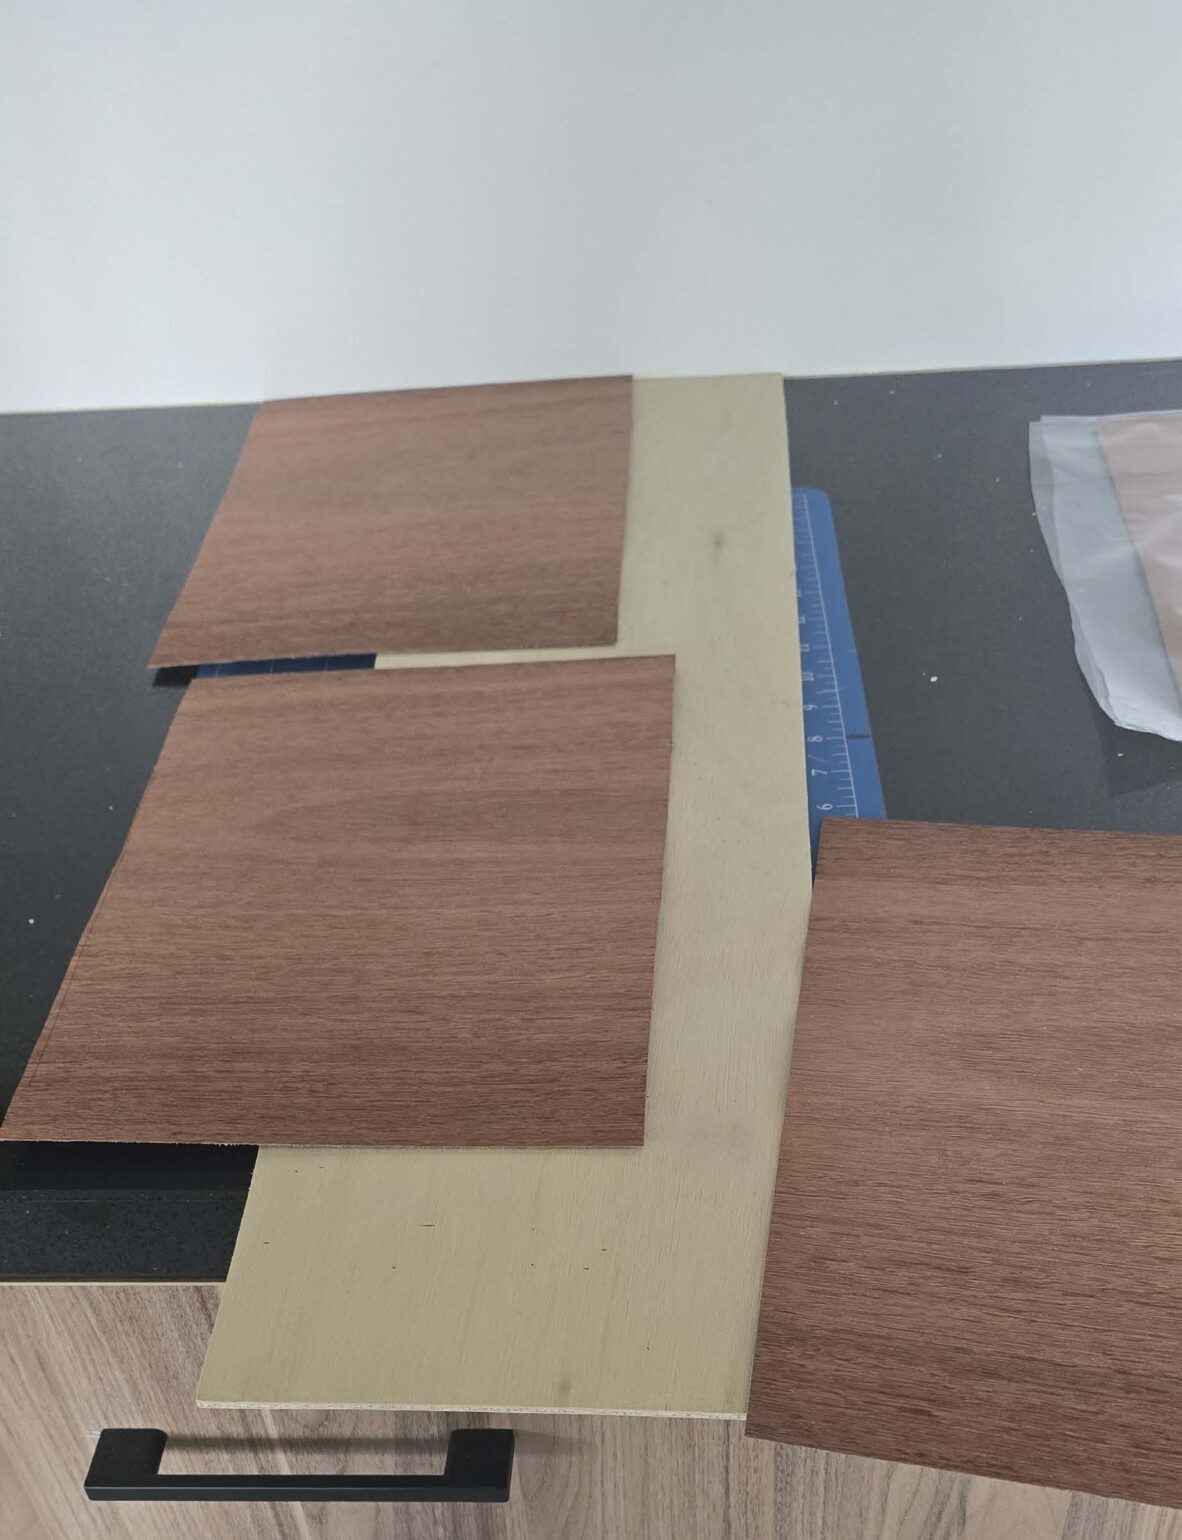
The first photo below shows three pieces of veneer cut for one stair riser. You have to cut three pieces to cover the stair and ensure the grain runs vertically. The excess on the side will be cut off and used again for the next stair riser.
The second photo shows the same piece after the veneer has been ironed on and excess has been trimmed.
Ironing the timber veneer onto the plywood
Before ironing the veneer on to the plywood, I decided to do a few test pieces on a rough board to get the hang of this, and I’m very glad I did! There’s a few things that can go wrong, and I’ll use photos to explain this.
- Too much heat causes the veneer to shrink. This results in the veneer splitting because of lack of moisture. So I adjusted the iron to be a lower heat and I also gave it a light spray with water so it wouldn’t dry out so quickly.

- To join two pieces, you need about a 1mm overlap. Too much of an overlap results in a bumpy, unsightly edge. Too little of an overlap results in a gap. To help get the correct overlap for the join, I used some tape to hold the piece in place at the correct overlap amount.
- When using tape, stick it across the grain not vertically down the grain. This is so that when you (carefully) remove the tape, you lessen the risk of ripping splinters off the veneer.
- When ironing over the tape, I covered it with some baking paper as I wasn’t sure if the tape would melt under the iron.
- It’s hard to cut the veneer to the correct size as the plywood, so cut it a bit bigger and trim off the excess. Again, make sure you use a sharp stanley knife to avoid tearing the veneer. Then cut on the reverse side using the plywood pattern as your size guide, as shown in next photo.

Staining the veneer
This wasn’t originally one of the steps we were going to do in our plan. Despite selecting timber veneer with the jarrah colour, it still seemed too light for the intended purpose and didn’t blend well with the existing teak veneer. So we decided to stain the veneer and make it darker.
We set up a number of test pieces to try different options, including mineral turpentine, isopropyl alcohol, brown dye, and timber stain. Eventually we agreed that a redwood timber stain gave us the best outcome.
The photo below shows the face of each riser after it was stained. To apply the stain, I wore rubber gloves, cut up pieces of sponge and dunked the sponge into the tin of stain. Once I wiped it over the riser, the result was a darker finish and much closer to what we wanted.

Gluing the veneer covered plywood to the riser
Before doing this, I did another pattern check to make sure each piece would fit correctly. There were a couple of pieces that seemed a bit tight – possibly because I didn’t quite trim the excess veneer back sufficiently – but this was easily resolved by lightly sanding the edges.
To glue the new piece onto the existing riser, I used liquid nails. It was important to make sure I didn’t apply to much to the edges as I didn’t want it oozing out! To help hold it in place until it dried, I put some pieces of lead against the riser.
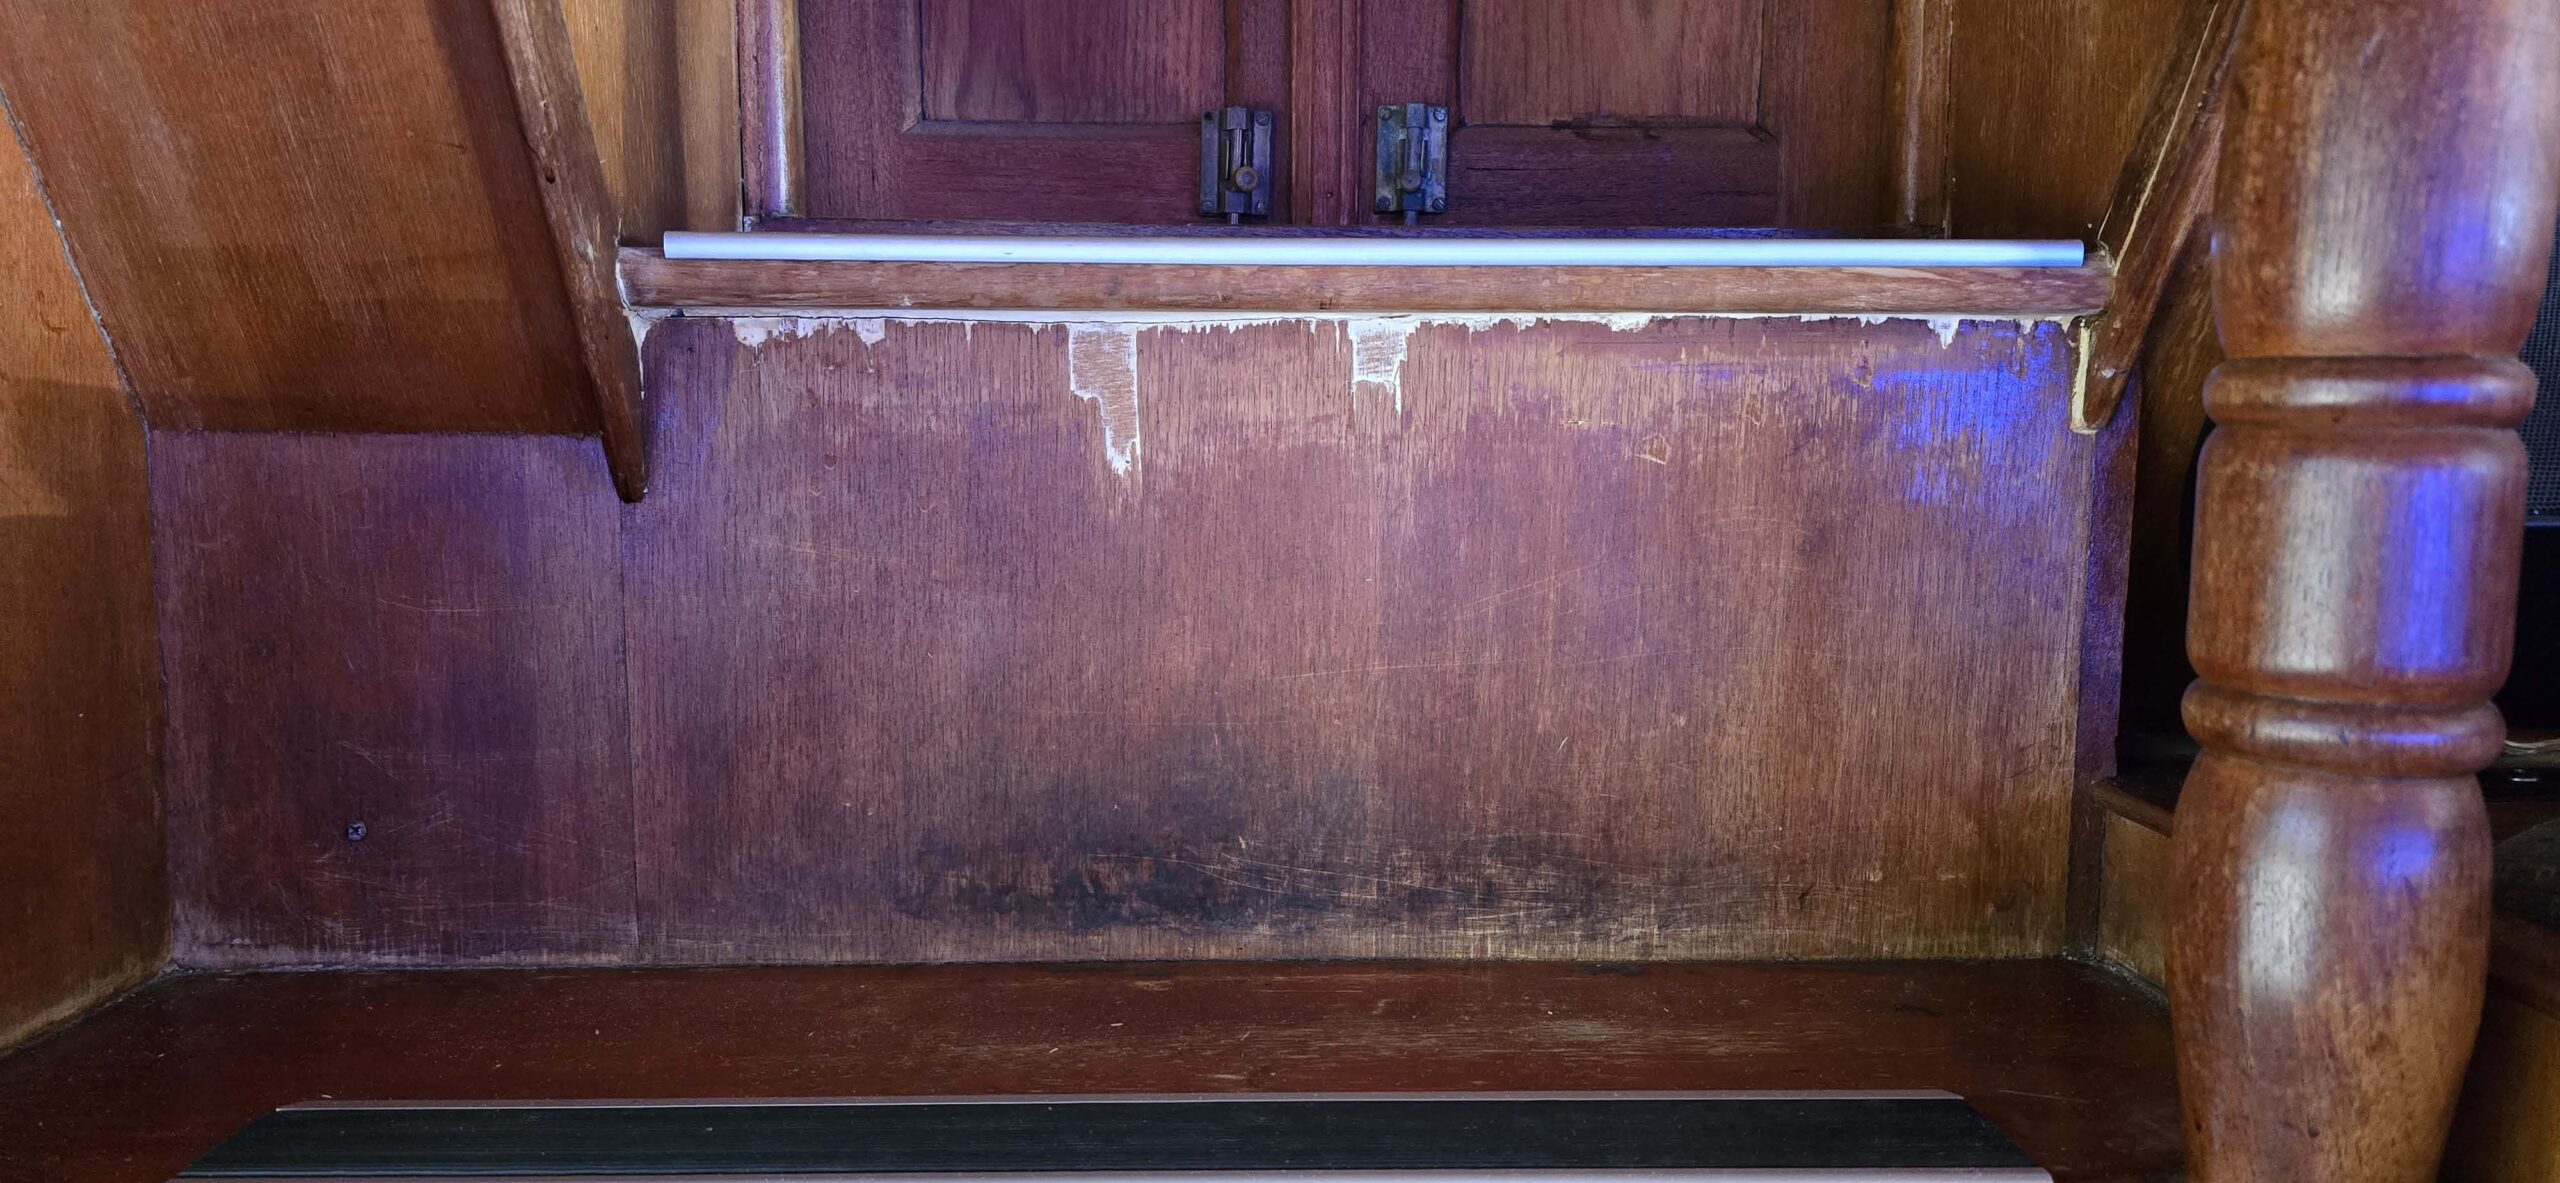
I think you’ll agree the end result is a vast improvement, especially compared with the most damaged step.
And how about that damaged stair riser that I showed in the feature image? Well here’s the same photo and the after photos. I think you’ll agree the outcome is a vast improvement.
Since starting this blog, I’ve also sanded the stair treads (these are solid timber) and applied oil to them. They’re not perfect, but by my motto, they’re better than before. My next project will be sanding and varnishing the hand rail on the right side of these steps.
My best tip that saved this project!
Despite my best efforts to carefully iron the veneer on, sometimes splits still happened (grrrr). When I first started ironing the veneer on, this happened too frequently resulting in a few tears of frustration and much swearing! But after thinking about this some more, I realised the following solution.
If too much heat causes the veneer to shrink and split, perhaps if I saturated the split section with water it would be reabsorbed into the timber veneer. I tried this, then lightly ironed on either side of the split, applying some pressure to “push” the veneer towards the split. When the timber veneer expanded just enough to cover the split section I stopped ironing it and waited for the veneer to dry naturally.
Thankfully this worked. I stopped wasting pieces of veneer that I thought I couldn’t use and I also reduced the swearing!
7 Responses
The way you fixed the splits was so clever!
Congratulations on another job well done.
So good to hear from you, we were beginning to worry. Thank goodness all is well with both you Robert, and Poseidon.
Looking forward to finding out where you are buying.
There’s nothing you two can’t do😜
Woweee!
When excellent is the only good.
May
Wow!!! That’s a seriously great result Pam 🙌 well done xx
Wow, how talented are you Pam. Poseidon will look like new when you finally part.
Nice work Pam!
Doing the handrail will be easy, but as for the balusters – well that will be a different thing entirely. Please post if you come up with an easy way to do them!